


So, you’ve heard about FamZoo’s “family pack” of prepaid cards. You love the story:
- Multiple linked cards for one low fee.
- Instant, free transfers between parent and child (sub-)accounts.
- Safe purchasing/donation power for kids.
- Lots of visibility and control for parents.
- Online and mobile access for each family member.
- Tons of built-in family finance tools that teach kids fiscal responsibility.
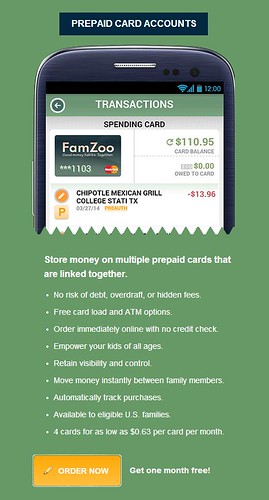
- No risk of running up debt.

This post is for you. Prefer watching to reading? Watch this video instead.
The High Level Steps
The high level steps are simple:
- Order your cards.
- Activate your cards.
- Set up your “bank” rules for allowance, chores, extra jobs, parent-paid interest, etc.
I describe each step in more detail below. And, to top it off, I include a slide show at the end with comprehensive screen shots so you know exactly what to expect.
1) Order Your Cards

To start ordering your cards, visit FamZoo.com and click on any of the Try It buttons or links to get to the sign-up section on the home page. Then click on the Order Now button to begin the order process which consist of the following high level steps:
- Register your family: Fill in the form to reserve your family name and create an account for yourself (the registering parent). You’ll add the rest of your family members a little bit later.
- Choose a subscription plan: As you may have heard, FamZoo has a generous free trial period for our IOU accounts — at least 2 months and typically 3 for early bird subscribers. So families who use our IOU accounts don’t need to commit to paying for quite some time while checking things out. When it comes to using our prepaid cards though, you’ll need to become a paid subscriber first. Why? We simply can’t afford to ship out cards without collecting some payment up front. Fair enough? But, here’s the good news: you’ll still get credited for a free month. If you choose the monthly recurring payment plan, your first charge won’t occur until after your free month has elapsed. If you choose one of our pay-in-advance plans (better deal!), your free month will get stacked on top of your paid months, so you won’t have to renew until the combined paid months plus the free month have elapsed.
- Assign cards to family members: This includes your parent funding card, any additional cards for parents, and one or more cards for each child. You’ll get to assign a family member, label, and category (spending, saving, or giving) to each card. If you aren’t sure about whether you want certain cards just yet (like a separate saving card for a child), no worries. You can always order more cards later.
- Verify each legal cardholder: You’ll be asked to fill in our online verification form one time for each family member whose name appears on a card as a legal cardholder. To review the info you’ll need to have on hand for verification, see here.
- Checkout: In the shopping cart that floats along the right side of the order forms, you’ll see your subscription fee, the amount to be initially loaded on the parent funding card, and charges for any extra cards beyond the first four. Once you complete payment, your cards will be on their way and should arrive at your doorstep within 7 to 10 business days.
Note: If you’ve already been using FamZoo and now you want to order some cards, then just sign in to your existing account as a parent, visit the Store tab, and click on the Order Cards link in the left hand sidebar. You’ll jump into step 2 of the order process above (or step 3 if you’ve already subscribed).
2) Activate Your Cards

To get started, you’ll be prompted for the admin number and the activation PIN for your parent funding card. The card carrier insert that comes in the envelope with your cards tells you how to find that information on your card (along with other important info, so don’t throw it away!).
You’ll be asked to update the PIN on your parent funding card, and then you’ll be taken to a screen listing all of the cards in your family pack. Here, you can review your cards, make changes to a few settings, and change PINs for family member cards.
At this point, your cards are ready to be used for purchases and donations.
3) Set Up Your “Bank’ Rules
Before you turn your kids loose though, you’ll probably want to set up some basic rules in your family economy. Here are a few to consider for starters:
- How will the kids get funds on their cards? A regular allowance? Paid chores? Manual transfers from mom or dad? Direct deposit from a job?
- Will you provide incentives to encourage saving? Perhaps an aggressive parent-paid interest rate?
- Will the kids be responsible for sharing family expenses? Perhaps part of the family cell phone plan?

The last few activation screens provide a quick start for allowances as well as pointers for setting up chores, issuing parent-paid interest, and controlling IOUs between family members.
If your family was already using FamZoo’s IOU accounts prior to ordering cards, be sure to check out this post: Transitioning to a Prepaid Card.
For even more information, be sure to consult our Card FAQ.
Remember, you can always start nice and simple. You can add more cards and experiment with additional settings later as you get comfortable running your virtual family bank and find what works best for your family’s unique situation.
The Screen-by-Screen Details
Would you like to see each and every screen for the steps above? Check out the slide show embedded below or click here if you’re having trouble seeing it.
Next Steps
Once you’re up and running, here are just a few things you’ll want to consider sooner rather than later:
- Reload your funding card.
- Get the mobile app: iPhone, Android.
- Set a savings goal.
Oh, and if you ever have any questions about FamZoo, be sure to contact us. We’re always delighted to help.
Post a Comment